Hi, I’m Steven T. Jackson OBE, founder of NewReg.co.uk. With over 35 years in the number plate industry, I’ve helped countless individuals find their perfect private number plates; and I’ve fixed a fair few to cars in my time in the business too!
Once you’ve secured your ideal plate, the next step is fitting it to your vehicle. This often means removing your old number plates. In this guide, I’ll walk you through the best methods to remove number plates, whether they’re stuck on with double-sided tape, fixed with screws, or attached using other methods.
Before You Begin: Assess How Your Acrylic Number Plates Are Attached
The first step is to determine how your front plate and rear plate are fixed to your vehicle. This will dictate the best method for removal. Acrylics are typically attached in one of the following ways:

Screws: Acrylics secured with screws, sometimes hidden under plastic caps.
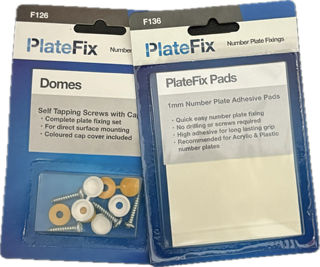
Double-Sided Tape or Sticky Pads: Acrylics stuck on using adhesive pads or tape.
Pop Rivets: Less common, but some acrylics are fixed with rivets, although this is normally something reserved for older aluminium styles.
Understanding the fixing method will help you choose the appropriate removal technique.
Scenario 1: Removing Number Plates from a Previously Owned Vehicle
Step 1: Examine the Fixing Method
If you’re dealing with a second-hand car, chances are the number plates are already attached. Inspect your plates to see how they’re fixed:
- Screws: You’ll need a suitable screwdriver.
- Adhesive Pads: Removal requires a different approach.
- Pop Rivets: May require drilling.
Step 2: Removal
If your number plates are screwed on:
- Remove Plastic Screw Covers: These are often white, black, or yellow caps that hide the screws for a neat finish.
- Unscrew the Number Plate: Use a screwdriver to loosen the screws. Turn counter-clockwise.
- Support the Number Plate: As you remove the last screw, hold the number plate to prevent it from falling and damaging your car.
- Check for Additional Adhesive: Sometimes, even screwed number plates have double-sided tape or sticky pads for extra adhesion.
For a number plate stuck on with double-sided sticky pads:
- Try Manual Pulling: Gently place your fingers under the edge of the plate and pull firmly but evenly. This might be enough to unstick it.
Use Dental Floss or Fishing Line: If the plate is more stubborn, take some dental floss or fishing line.
- Wrap it around your fingers.
- Slide it behind the plate.
- Use a sawing motion to cut through the sticky pads.
- Alternatively, fishing line works similarly and can be more durable.
Apply Heat: If needed, use a hairdryer or heat gun to warm the adhesive.
- Set it to a moderate heat.
- Move it back and forth across the plate.
- This will loosen the adhesive.
If your plates are attached with pop rivets:
- Prepare a Drill: Use a drill bit slightly smaller than the rivet.
- Drill Out the Rivet: Carefully drill into the rivet to remove it.
- Proceed with Caution: Avoid enlarging the existing holes in your car.
- Consider Alternative Fixing Methods: When attaching new plates, you might opt for sticky pads instead of re-riveting.
Step 3: Clean the Surface
After removing the number plate:
- Remove Residual Adhesive: Gently rub off any sticky residue.
- Use Adhesive Remover: If necessary, apply a suitable adhesive remover.
- Clean the Area: Wipe down with soapy water to ensure a clean surface for your new plates.
Scenario 2: Managing Number Plates on a Brand-New Vehicle
Step 1: Speak to Your Dealer Ahead of Time
If you’re buying a new car:
- Contact Your Dealer Early: Discuss how you’d like your new number plate attached.
- Request No Drilling: Ask them not to drill screw holes into your bumper.
- Prefer Adhesive Pads: Suggest using double-sided adhesive pads instead.
Step 2: Request Adhesive Pads Instead of Screws
Adhesive pads offer several benefits:
- No Damage to the Bumper: Avoids unsightly holes from screws.
- Clean Appearance: Plates sit flush with the car.
- Flexibility: Easier to reposition if needed.
Step 3: Fix the Number Plates Yourself
If the dealer agrees:
- Have Them Leave the Plates Off: You can attach them yourself.
- Use Quality Sticky Pads: Ensure they are strong and suitable for exterior use.
- Position Carefully: Take your time to align the plates perfectly.
Benefits of Using Sticky Pads
Using sticky pads to attach your new plates:
- Preserves Car Aesthetics: No screws or holes.
- Simplifies Future Removal: Easier to remove plates without damage.
- Provides Strong Adhesion: Modern adhesive pads are very reliable.
Safety Precautions
When removing or attaching number plates:
- Avoid Brute Force: Don’t yank the plates off; use the methods described above.
- Protect Your Car: Be careful not to scratch the paintwork.
- Use Proper Tools: A heat gun or hair dryer should be used cautiously.
- Wear Gloves: Protect your fingers when handling sharp edges or adhesive.
Tips for Installing Your New Number Plates
- Use Your Old Plate as a Template: If drilling screw holes, align them correctly.
- Consider Number Plate Surrounds: These can enhance the look and protect the edges.
- Check Legal Requirements: Ensure your new plates comply with DVLA standards.
Removing and replacing number plates doesn’t have to be a daunting task. By understanding how your plates are fixed and following the right methods, you can safely remove them without damaging your vehicle. Whether you’re upgrading to a personalised number plate or replacing old plates, taking the time to do it properly will ensure your car looks its best.
At New Reg, we’re here to help you every step of the way. From finding your perfect plate to providing advice on fitting, we’ve got you covered.
Note: Remember to dispose of your old plates responsibly, and always ensure your new plates are securely fixed before driving.